That’s very true. Maybe just bouncing and committing to the mix is better after all ![]()
1 Like
Speaking of exotic features…
Does anyone know of a way to change default values? For example, having the envelope of the FPC default to something like attack:0, release:0, etc? Or at least linking each pad’s ADSR to one another so I don’t have to adjust every single one of them just to make them behave like every other DAW’s drum machine?
I’m grappling with these strange conventions and default values ATM because it slows down progress, lol
1 Like
Save your preferred setting as a preset and load it up. I think you might be able to overwrite the default by just renaming your preset, but not sure about that.
1 Like
That’s a good idea. The only thing that sucks is adjusting every individual pad upfront, but you’re right that if I at least do it all once I can just load it up next time. That might actually work really well!
1 Like
Anyone else using the stem extractor? I upgraded to whatever they call edition 2 and I can’t believe how good the quality is when you extract stems from random shit. I’m not normally one for using external samples, but this seems like it could make for some hilarious remixing material.
Also, pretty sure I used Spleeter semi-recently and it wasn’t nearly as clean as this. This is nuts
2 Likes
I haven’t played with it yet, I haven’t had the time to dedicate to upgrading and would rather have my DAW available for when I want it. I’m just being a grandpa, but even with this feature I’ll probably still sample/remix/bootleg the old fashioned way because using stem extraction won’t have the same vibe.
1 Like
If you just update to the latest FL once, starting last year they now auto DL/install newer versions in the background. TBH that is the best change FL has made in years.
2 Likes
Oh nice. Thank you. I believe I am on the version right before the stem extractor update. And agreed, that is a major update I am all about!
1 Like
I think it does initially make you download the extractor, too, but it all seemed internal for me. That felt weird, because I wasn’t expecting any part of it to be automated. FL is stepping up ![]()
Also, IIRC this thing is still in beta, so I can’t wait to see how good it is in the future. I’m already planning some ridiculous remixes for whenever I have the time and motivation, because some of the things I’ve ripped came out super clean (anything with minimal compression seems to really go over well). Might even have to drop some weird shit in this thread just because it’s relevant, but it’ll take a little time
Day 206:
So I finally figured out that you can choke and choke-to other FPC pads, which is the default pad behavior I wanted, but I can’t find a “map to siblings” setting like you can do in Live or Bitwig, so every single time you chuck another sample in there (and for me this is like every 5 seconds) I have to go and adjust the settings so my shit doesn’t overlap. I’ll probably do a RTFM session because somehow everyone glosses over this. I guess I do more resampling than the average bear, but it’s a pretty huge bottleneck when trying to make music.
I know I’ll eventually fall in love with the workflow once I find some workarounds, but FL Studio is the single-most ass-backward piece of software I’ve ever worked with in my life. Even Renoise is more intuitive somehow
I find a lot of the default settings in FL stock plugins are terrible. They’re the ultimate combination of “not a neutral/bypass sound” and “doesn’t fit what I’m making right now at all”. You can save your own preset and make that the default.
Did I ever tell you it took me 3 years to figure out how to get good swing? Not 3 years at the start, I just figured this out like a year or two ago after ignoring the problem for most of a decade. Then once I decided this was a problem it took me 3 years to deal with it. I’ll save you the pain and just tell you what to do.
https://drive.google.com/drive/folders/1VbrvuutwXo7YTbfNOXoyxeQws2xzhBfu?usp=sharing
You are going to download that folder full of groove templates, which has the timing/swing data from MPCs and a few house songs I’ve used over the years. You can select any subset of notes or just an entire piano roll pattern, and then you use “alt-q” to bring up the quantize tool. Click the folder button and point it to the groove templates folder. Load one of those templates and quantize to that.
It is extremely important you do it this way, because the default FL swing slider only will apply swing to consecutive 32nd notes. Not eights, not sixteenths, and not anything on an odd step. This will swing approximately 3% of drum hits in most of my music, which is worse than useless.
Thankfully, doing swing this way does open up some new opportunities. For instance, swing your hihats a little more than your claps, and swing your bass but not the kick drum, etc. You can even swing just certain bars/beats this way.
Protip, if you want to select only your hihat, or a single note within your pattern (like all instances of A), bring up your select tool in the piano roll and just click on that note on the left hand keyboard. It will save your sanity if you want to swing each part of a drum pattern a little differently. You definitely don’t need to though, usually one groove template can just be applied to most of your project (with maybe a bit less on something like a lead/arp and a bit more or less than the drums on the bass). But deep in the house rabbit hole, they tend to swing lower frequency stuff less and higher frequency stuff more, and you can do that this way.
1 Like
Whoa, they don’t just have a triplet grid on the piano roll like everything else? I knew about the swing slider, but I thought they’d at least just have a quantizing option that allows for the manual version like everything else.
After doing quite a bit of manual-reading, I’m noticing that they put a huge amount of work into areas I wouldn’t normally expect, from the massive quantities of piano roll functions and note grouping to the track / mixer linking and bouncing functions I never even knew existed.
(A lot of the synths I have in there are ‘trial’ versions because of having a mid-tier edition, but since I resample a lot anyway, just bouncing to audio saves the day in scenarios like this unless they have some kind of protection on it. I’m also a bit stoked to use that really overpowered distortion unit, although I always forget what it’s called)
Also, multiple arranger tabs? Never seen anything like that in a DAW before, but that sounds like a great way to design sounds on the fly without having to open up another session. I haven’t even read about their sampler functions yet, so I get this feeling that whenever I get into the metaphoric (and maybe also literal in this case!) groove of using the DAW, it’s going to be my favorite one of all.
I used to hate painting clips in, too, but with that linking feature it’s probably going to feel way more flexible. Where’s that OTT when you need it here? ![]()
Wow, some of these features really seem half-baked. I wonder if I’ll ever get used to them.
-
Edison is so damn cool, except it’s strange to me that you can’t just non-destructively edit on the fly. When it’s embedded in FPC, just trying to put some fades or reverse your drum hit seems like it requires saving (or overwriting your sample), reimporting, etc. I hope I’m wrong about this but it seems like it’s just the way it is.
-
Linking to tracks isn’t nearly as cool as I thought. I figured you could just have a few different busses and paint your samples into different ones interchangeably like you can in Renoise, but no dice. It just sets the default of your track’s mixer to a different integer. So it’s literally just a visual trick and nothing more. Worse yet, if you actually paint them into different mixer track zones it just duplicates the file so editing isn’t uniform anymore. Kind of bizarre that the feature even exists at all.
-
FPC choke groups are cool when you set everything to the same integer, but trying to figure out how to swap out ‘groups’ (or identify the concept of a ‘group’ in general) is hard when it’s undocumented. Maybe they’re referring to the pad’s individual layer index? That makes layering even weirder.
-
Mixer groups don’t seem to have a purpose. You can route and bus all day from wherever to wherever, but creating a ‘group’ out of a mixer channel seems to change nothing at all. You can’t add other buses to the group or anything, so I’m still trying to figure out if there’s any significance to the notion of mixer ‘groups’ (which seem oddly singular).
-
Adding anything to any group is so weird. There doesn’t seem to be any way to to just shuttle your instruments off to the ‘drum’ group without going to add group > create new group (and then typing in the exact same name again). Then if you spell it wrong, you have more goddamn groups.
-
You have to actually render and reimport absolute silence in order to get a proper silent choke out of FPC. Most other drum pad sequencers have a mode for this that just allows for no gate to equal silence, but these will literally keep running forever unless they’re choked – which is where the silence.wav comes into play. Am I crazy or are they?
I swear I will conquer this somehow. It’s all I’ve got to work with, lol
(Also, I hope I’m wrong about some of these, but time will tell!)
So I think if you’re trying to do much in the way of editing within FPC, you’re doing it wrong. I don’t have it in front of me right now, but I think you can do basic attack/release/leveling in FPC, and I know you can reverse (there’s a little arrow under the sample waveform, click that and you reverse that sample). If you need more than that, time to consider slicex IMO. Just render everything in your drum kit out and import that to Slicex if you’re going to render out. Slicex has straight edison built in, plus it’s an autoslicer. I don’t know my way around it enough to say it can do everything, but it has (with some work on my end) been able to do everything I wanted it to.
I think this is for people who really really NEED groups or their heads would explode. I don’t use the function either. The way I set my projects up, I leave a few monitoring tools on my master channel, skip channel 1 to leave it open for sampling, quick tests, etc. After that I put each instrument/drum on it’s own mixer channel, and I just send those channels to various summing channels (and disable their send to the master) or FX sends that are just made of regular mixer channels. I guess in theory groups could speed some of that up, but I’m used to doing it my way.
If this is referring to what I think it is, this is super useful for mixing finished stems. Say I have a client send in 80 tracks of audio, I can use this to drop all those stems into the playlist and it will auto-route each one to a dedicated mixer channel with the channel name pulled from the stem. Then all I have to do is color code them and add a few spare mixer channels to bus the various instruments into. Compared to doing this manually and spending 2-3 hours, I can do this in 20 minutes. Would make zero sense to use this for each sample in a project though. Again, I could be backwards on this, but I think that’s what you’re talking about.
In principle, I know what’s going on here but it never quite works the way expect. It has nothing to do with layers, the choke groups are per pad. The idea is you might choke your hihats off each other and that could be choke group 1. Then you might have another group 2 that doesn’t let more than one tom play at a time. And so on and so forth. I’m sure there’s a youtube video somewhere that explains this crappily in a way that makes sense, but I haven’t bothered looking for it.
IDK on this one, I only use FPC for drums and I go out of my way to keep my drum samples tight.
1 Like
Wow, there’s a good possibility that this is my answer here. Because even though other DAWs are more flexible in this department and I can get away with it in the Live / Bitwig domain, I’m indeed triggering long samples with FPC rather than drums, and at least as far as FL goes, that seems to be the absolute wrong tool for the job. That explains why nobody else is having to render custom silence clips for their choke groups, and why nobody mentions problems like this anywhere. Nice detective work! I forgot to mention all of that.
It looks like I have SliceX in my tier-2 edition (whatever it’s actually called) so I will have to investigate this! It also seems like, even at the worst-case, all I’d have to do is string a bunch of samples together with one of the many bounce functions and reimport for trigger spamming. That’s a huge weight off of my shoulders compared to using FPC for long samples!
Yeah, I think you and I are on the same edition (producer?). You are missing the newer stuff and some of the more specialty plugins (like Harmor, which I added to mine, Ogun, Sakura, Drumaxx, the 303 emu, vintage FX) but you somehow get Sytrus and Slicex which would be $100 plugins from anyone else. I’m not complaining.
Yeah, that sounds about right. I don’t even know what half of them are, but thanks to being able to bounce to audio on the fly, I’m going to be doing a heck of a lot of sound design in FL from now on. I can’t believe how much exists here for a grand total of $100 on their flash sale deals. Absolutely legendary.
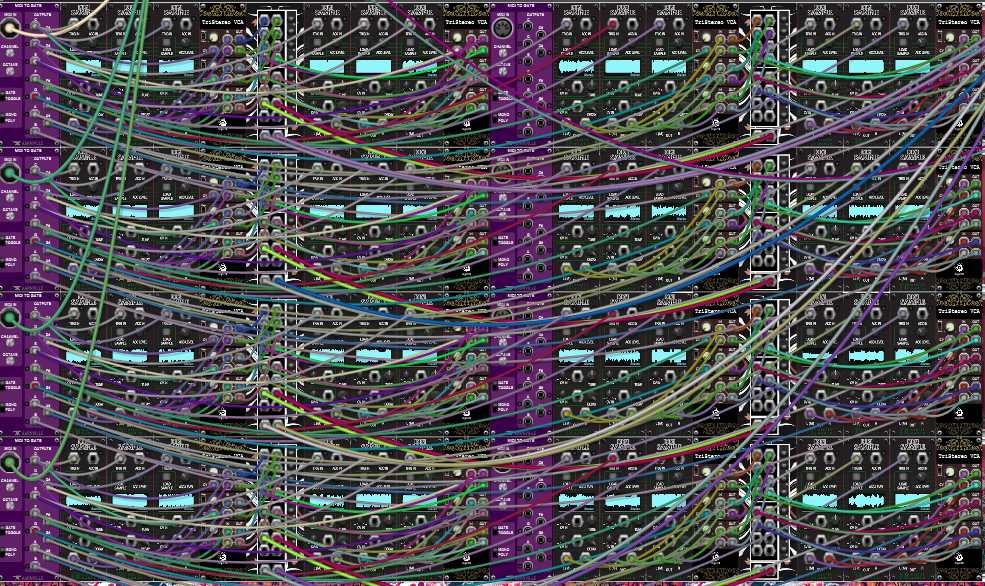
I think I fixed my last issue with a little bit of retard ingenuity. Being able to spam samples on the fly just wasn’t working out, no matter how many flags / zones I tried to set up and dump into SliceX (although that’s going to be a wild breakbeat mangler!). This thing covers 4 octaves so far, and every mini sampler hooks up to its own VCA so they can’t overlap, so long as I stay in mono-sequencing mode. Tragedy averted!
1 Like
I’ve tried pretty much every snap algorithm and shit like this keeps happening. Zero-crossings is disabled, stretching / repitching the sample is disabled, and for some reason I’m not allowed to just snap to the grid. If any of you FL gurus know what’s going on, any advice would be greatly appreciated!
Here’s a second view. It seems more than just a singular glitch because when I rebooted, the one clip in question actually started adhering to the grid and now all of the others don’t. This is pretty confusing. Also, everything quantizes to the start of the grid, but just resizing by length with zero-crossings and warping off jumps to the tune of its own random floating point kazoo melody or something
Edit: Seems like the slice tool is a technical workaround that does adhere to the grid, but it’s another one of those productivity bottlenecks. Hopefully that’s not the only way to get things to adhere to the grid ![]()
Yeah, I don’t love this either, but here is the understanding I’ve come to.
That magnet in the top left? It controls how things will STEP when you adjust the length of something. So say you have it set to “beat” and the clip you’re adjusting is halfway between two beats? It will now move left/right in exactly 1 beat increments but stay halfway between the beats. It’s separate from quantization.
So if you drag audio in and you want it on the grid to adjust, you have to get the audio onto the grid via slicing first, then you can drag it around in those quantized fashions. If you want to be able to edit audio clip length precisely, then you need to set snapping to “none” under the magnet menu. I use that for doing fades in mastering all the time (unless I know the tempo of the song and I want the fades in time with it).
Also worth noting, the defualt behavior (and I think this can be changed but it never bothered me) is that grabbing the right side of an audio clip will resize it, not move it. Resizing audio clips in the playlist isn’t something I do a lot of because all the audio is still there, and in certain situations it can even play while the clip isn’t there (If you resize to the left it may hide the audio but not DELETE the audio). And resizing to the right, as you will have noticed, does not copy the existing material but rather reveals any hidden material. For this reason, I am very picky about my samples, I keep them trimmed and if I want copies I copy my trimmed material and drop in copies of that.
So a good workflow to get into if you don’t want any surprises is to drop the sample in at the very left of the playlist so you know the start will line up with the grid. Cut off any excess using the slice tool and delete it, and then drop the copies of that remaining part you want into the necessary parts of your project.
1 Like
Wow, that’s so interesting. It definitely seems like everything fits together just fine as long as you use the slice tool. I kind of like the clip offset nudge (shift, I think?) I accidentally discovered when trying to scroll horizontally the first million times. It’s pretty cool how those slice points conform, and you can even swap out audio clips on the fly. I wish this function would make the audio files unique instead of overwriting other instances of it, but I could actually see all of this coming in handy during mixing and mastering-type sessions.
Seems like a lot of quirks compared to other DAWs, but I see how a lot of FL users just eventually get used to them (although I did find a lot of people saying similar things about the playlist editor on their own forum). I do like of like how the playlist is treated like the piano roll in terms of quantizing, though. It’s almost like you could just smear some stuff around, quantize it and then trim the excess for some wild design times.
One really high point is the audio FX. Mixing and getting a nice, juicy sound (along with routing and bussing) is probably one of the slickest experiences I’ve ever had in a DAW. Plus, their limiter is pretty fabulous