So, I’ll do this is multiple posts as to not confuse people between the types, but It’s really not too hard to create any type of kick. Just so you know, this is a tutorial for FL Studio. If I actually learn Ableton 12, I’ll update this thread… I’m out of time today, so I’ll post the first part tomorrow asap.
2 Likes
So, to start you’re going to need a 200 bpm project, and a sustained synth of some sort. Pitch the synth down by 2 or 3 octaves (usually) to create a subby sound and then we can actually start creating the kick. Keep in mind, the bass is better off being a mono waveform, like a serum preset. Phasing messes with the kick.
-
Create a note for one bar with the synth. Quick rundown on notes to choose: Anything above E, up to B is best for most sound systems, but the kick should be the same key as the track, or a perfect fifth up or down.
-
Add the synth to a mixer and start with any reverb. Turn the wet volume to 0. This adds stereo info to the kick that will be more pronounced after distortion.
-
Next, add an EQ and boost everything with “mid” in it’s name. Low, high, etc. The synth should sound really tinny and shit, but it’s going to be improved.
-
Add a Fruity Fast Dist with the “Pre” knob all the way up and the type set to B. A works, but lacks some of the treble frequencies that really good kicks have.
-
Open another EQ and boost the most resonant Sub frequency and the low mids once more. The kick should have a rich sound to it.
-
Open another Fast Dist and Do the same as the last. This time, A or B works fine.
-
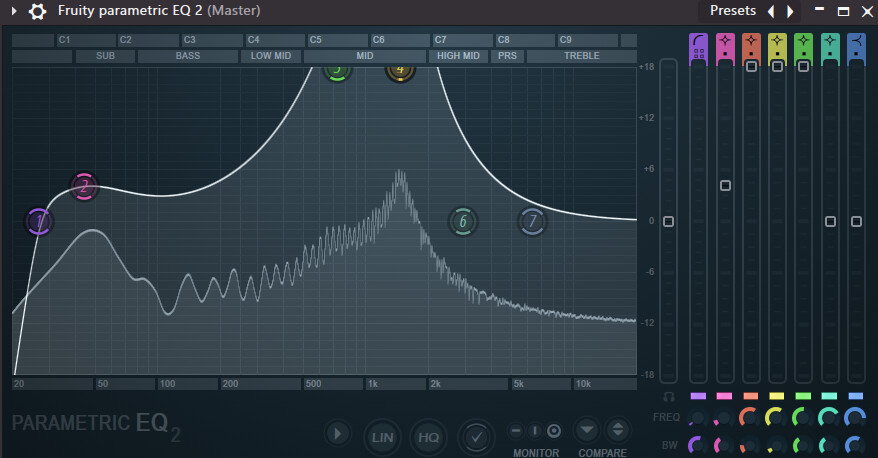
This is the main EQ you’ll need. Add an EQ once more and add sub, a wee bit of treble, and drop the 300 hz range by about 6 db.
like so
-
Soft clip and add yet another EQ. Add a tiny bit of bass and treble until you get whatever sound you want.
-
Now you’ll need to make the sub mono, so add a plugin that can do that. Usually and EQ with side-cut capability is good, but Maximus works, just turn off all compressors and make the bass band 100% merged.
-
Soft clip again and go back to what I dubbed the “Main EQ.” Create an automation clip for the resonant sub band’s gain, and go back to the playlist. This clip will control the kick’s movement.
-
There are a billion ways to do this, but generally speaking you’ll want to make a shape like this:
-
You can change this shape into whatever sounds best, I like the fake frenchcore kick:
-
Render the kick out by holding Alt+Shift+R on the mixer and then save, use, sell, I don’t care, do what you want with your kick! if you want to improve the sound, the best way to do it is to mess around with the EQs, distortion, etc. Listening to professional kicks can give you some inspiration too.
I took EQUAL2’s method and changed a LOT of things until I got my own sound, but you can add resonant points in the pre-dist EQs to get more tonal sounds and punches, you can change the bass sound, whatever, it’s your kick.
Next up is Frenchcore tutorial.
Frenchcore Kick!
This one is actually slightly easier to do, but It still follows a similar process. You’ll again need a 200 bpm project, but this time find a pitched EDM kick of some sort (punchy works best) and pop it onto a mixer slot.
-
Follow steps 2-5, but make sure Fast Dist is on “A”, and only add about 12 DB of sub for the second EQ. If you’ve got a nice, punchy kick, you should have a noisy punch with a sort of woofy bleeding sound.
-
Soft clip and render the sample with ALT+SHIFT+R on the mixer.
-
You should now have an audio clip in the playlist. Chop a small part of the kick near the punch, something like this:
-
Take this part that you’ve chopped and loop it for about a bar (making sure that the leftover clip isn’t playing WHILE it’s looping, like so:
 You should try to loop it about 3 times per quarter note, this gives the best sound.
 -
If you don’t like the sound, select all of the looped bits use the slide tool (S) to move the waveform around. Generally Frenchcore tails sound very rich and buzzy, so the closer to the transient of the kick you get the better. Once you’re happy, render the sound out.
-
Add the rendered clip into an empty mixer slot, and open some sort of tuner. (I use one called “GTune” that works fantastically.) You’ll want the bass to match you kick’s pitch, so adjust accordingly.
-
Take the two rendered parts and match them up in a “Reverse bass” order:
-
Render both parts out again and add the nearly finished kick to ANOTHER empty mixer track. Open up (in this order) a soft clipper, EQ, EQ for sub monoisation, and another soft clipper.
-
All you need to do now is add a wee bit of bass, drop the 300 hz range, and add a wee bit of treble to taste, then render out the finished kick.

That’s basically it, you can mess around in similar ways to the Uptempo kick, especially with the distortion settings, but Frenchcore kicks are usually pretty punchy, not really tonal or noisy, so consider that.
Other points to note, you can use already distorted kick sounds to do this, but you’ll have to fuck with more distortion and EQ for a better sound. DO NOT USE OTHER PEOPLE’S KICKS FOR DROPS. (Using them for fills is usually ok.) DO NOT USE THE SAME KICK MORE THAN ONCE. (It sounds repetitive and boring.) HAVE FUN. ![]()
Nice ! Thank you very much . I will try to create French House Type Kick’s next time i’ll open my DAW
1 Like
French house? No no no, this is FrenchCORE.
Trust me if you think this is a house tutorial you are going to be VERY shocked.
1 Like
i will try
New kick method I’ve been experimenting with recently:
You’ll need: Serum, OTT, FL studio stock plugins, and an EQ with side cut capabilities. 190 - 210 bpm.
To create the bass sound in serum, Sub on sine, don’t change A’s waveform, and B on harmonic morph (under the digital wavetables.) Make sure the random knobs are all the way down. You need to pitch the sound down enough to create sub (the saw wave should be really clicky.)
Use any note from D# to A#, anything else will sound bad.
Slot 1. Reverb 2. 0% Wet, 50% Stereo Separation, and 100% Early Reflections.
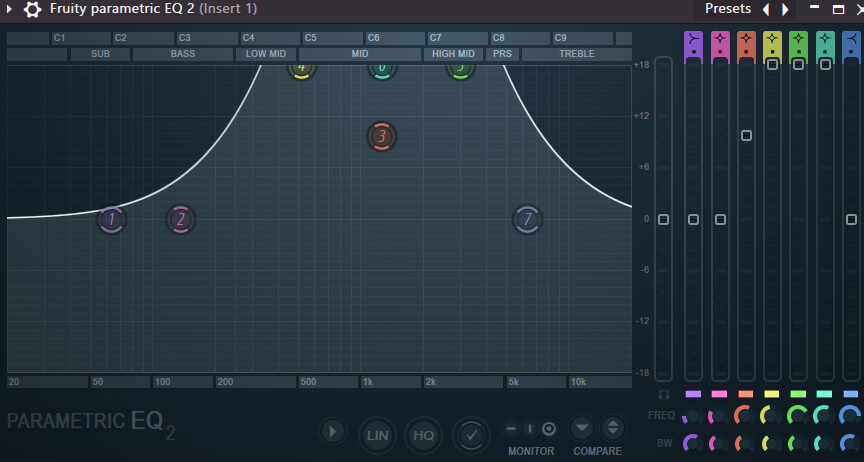
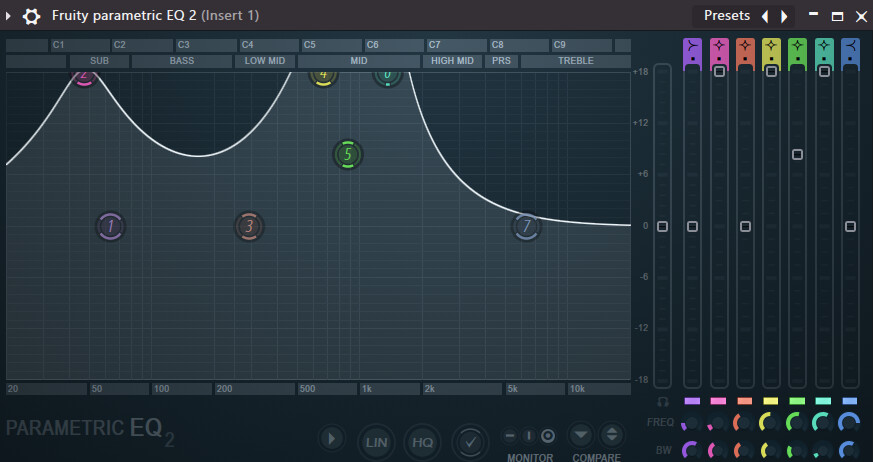
Slot 2. Parametric Eq 2. low cut just before the main sub frequency and boost sub by 3-5 db. Drag a point all the way up to mids and find a point the same or a perfect fifth from the note to boost. Like so:
This will make a hollow clicky sound, which is what you want.
Slot 3. Fruity Fast Dist on A, pre all the way up.
Slot 4. Parametric EQ 2, boost mids, sub, and that resonant frequency from earlier, you’ll be automating this for kick movement.
Slot 5. Fruity Fast Dist, same settings.
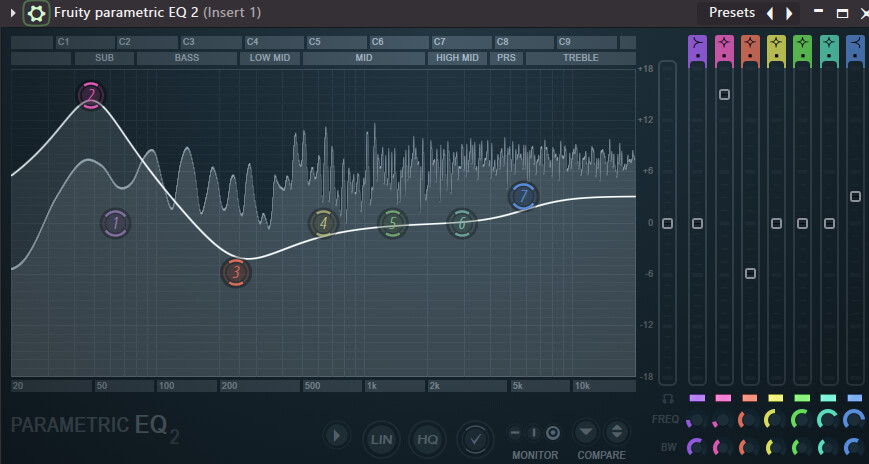
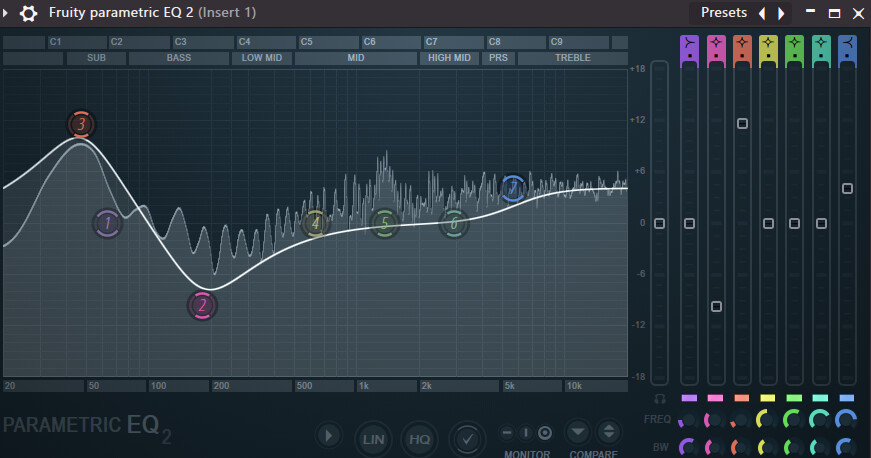
Slot 6. Parametric EQ 2 again. Now this is what I consider the important one. This EQ polishes the kick, essentially. Add enough sub so that you get a subby crispy sound. Too much will fuck with the kick.
Slot 7. Fruity Soft Clipper, threshold at max.
Slot 8. OTT. Turn depth and downward to 0 and lows up to full.
Slot 9. Monoise sub with a side cut EQ. I like to boost sub, bass and treble by about 2-3 db, also.
Slot 10 = Slot 7.
Cool, so right now you should have a fat sustained bass sound with a tiny little noisy click when you play it. If not, you need a LOT more sub, so add some more in slot 6.
Automation clips for this kick are easy.
To start, automate the mix of slot 1 like so:

Next, automate OTT’s mix:

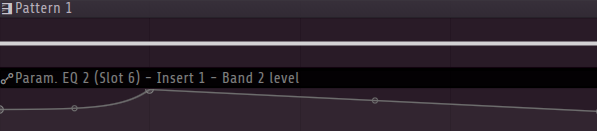
Now automate the band that affects the sub in slot 4. You’ll need to it the same as OTT, but at around 50% in the second half of the kick rather than 0%. Also add a tiny bit of a slide downwards:

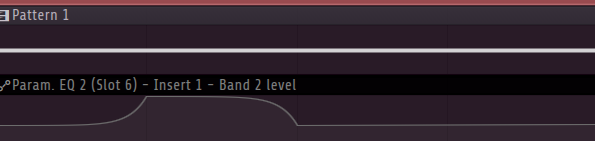
Finally, link the peak you’ve made to the sub automation clip and inverse the mapping (right click on the EQ band level, click link to automation clip, select the sub automation clip and type 1-Input in the box and click ok.)
This is practically just a frenchcore kick, but the special name for it is a “bounce” kick. They’ve very easy to hakk to.
I upload some of my kicks to samplefocus, too. If you want to see examples of decent kicks, go check it out
https://samplefocus.com/users/mechanotfurry
1 Like
Wow, I didn’t expect to see a sound design thread around these parts. Great stuff, visuals included, and it looks like there’s a lot of detail in here.
First I need to figure out what the heck Frenchcore is, and then I’m game for giving this a try ![]() . I’ve only heard of French house, but I think I need to expand my horizons anyway.
. I’ve only heard of French house, but I think I need to expand my horizons anyway.

Great energy!
I’ve posted a guide to hardcore techno genres, if you want to take a look at that.
Hardcore techno is like drugs. It’s a bit hard to get into a first, but you pick it up really quickly afterwards and get addicted.
Just keep in mind that this is only my method for making kicks, and there are tons of other ways.
Also, as a said to stealth, you’ll be really shocked if you think this is french house ( ̄︶ ̄)
1 Like